Kubernetes Taints: Scheduling Control, Use Cases & Best Practices



In most cases, admins don’t care which node within a Kubernetes cluster happens to host a Pod, as long as the node has sufficient resources to support the workload.
But sometimes, it’s important to have control over the nodes on which Pods are scheduled. You might want to avoid deploying them on nodes that you plan to take down for maintenance, for instance. Or, you might need to avoid using nodes that lack certain specialized hardware capabilities (like access to GPUs). Use cases like these are where Kubernetes taints come in. Taints offer a way of controlling which Pods reside on which nodes.
Read on for details as we unpack how Kubernetes taints work, when to use them, how to work with them, and how to manage common taint risks and configuration challenges.
What are Kubernetes taints, and why do they matter?
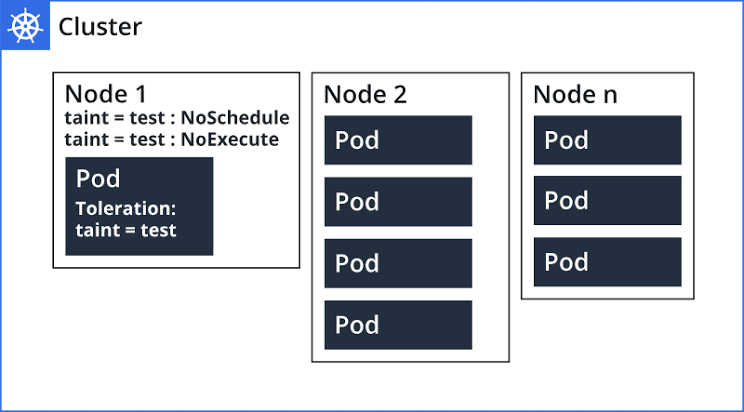
Taints are a configuration option that tells Kubernetes not to schedule Pods on certain nodes unless the Pods are specifically configured – via what’s known as a toleration – to run on the tainted nodes. Put another way, taints are like a sign that says “no Pods can run on this worker node unless they have a toleration that says they can.”
Kubernetes taints are important because they provide a way of controlling workload placement in a cluster. Unless you set up a taint, Kubernetes will schedule a Pod on whichever nodes happen to be available and have enough unused resources to meet the Pod’s resource requests and limits (if they are configured). But with taints in place, you can granularly determine which nodes will or won’t host specific Pods.
You can add taints to nodes that are already part of a cluster; you don’t need to configure them from the start. However, the impact of a new taint on the Pods that are already running on a node depends on which “effects” you define for the taint (we’ll cover effects in more detail below).
Note as well that under certain conditions, the node controller will automatically taint nodes; for example, if a node is unhealthy, the controller will taint it to prevent Pods from being scheduled. Master nodes are also tainted to prevent ordinary workloads from running on them. Note: While Kubernetes now uses the term "control plane node," the previous term is still widely recognized and commonly searched.
Taints vs. node selectors
Taints aren’t the only way to control workload scheduling in Kubernetes. The other common method is node selectors. The latter are Pod configurations that you can apply to a Pod to tell Kubernetes that the Pod should run on nodes with labels that match the node selector configuration.
Unlike taints, however, node selectors won’t prevent a node from hosting all Pods except those with a specific configuration; Pods without matching node selectors can also run on labeled nodes. With taints, all Pods are rejected or repelled from nodes unless they have matching tolerations.
Taints vs. tolerations
Taints also shouldn’t be confused with tolerations.
As noted above, tolerations are the configuration option (configured within a Pod’s spec, not the Pod metadata) that allow Pods to run on tainted nodes. If a Pod has a toleration that corresponds with a node’s taint, the Pod can run on that node.
How Kubernetes taints work with the scheduler
Here’s a more detailed look at how Kubernetes taints and tolerations interact with the cluster scheduler:
- A taint consists of a key, a value, and an effect.
- When the Kubernetes scheduler evaluates where to place a new Pod, it checks every candidate node for taints. If a node has a taint that the Pod does not tolerate, the scheduler excludes that node from consideration.
- A toleration does not force a Pod onto a tainted node – it simply allows the scheduler to consider that node if it also satisfies other scheduling requirements such as resource availability, node affinity rules, and topology constraints.
Common Kubernetes taint effects and their behavior
The scheduling behavior is also influenced by the taint's effect configuration. There are three effect options:
- `NoSchedule` prevents new Pods without matching tolerations from being scheduled, but also existing Pods from being kept running (even if they lack a matching toleration).
- `PreferNoSchedule` tells the scheduler to avoid the node when possible but allows placement if no better options exist.
- `NoExecute` both blocks new Pods and evicts existing Pods that lack a matching toleration.
By combining taints, tolerations, and other scheduling policies, Kubernetes provides admins with fine-grained control over workload placement while helping ensure applications run on the most appropriate nodes.
When to use Kubernetes taints in real-world clusters
As a general rule, you shouldn’t use taints in Kubernetes in cases where a node can support any type of workload. If you apply taints unnecessarily, you restrict Kubernetes’s ability to take full advantage of the nodes in a cluster, which in turn reduces the flexibility and scalability of Kubernetes.
In any situation where it is important to control which workloads run on a certain node, however, taints come in handy.
Typical Kubernetes taint use cases in production
For example, the following scenarios represent common taint use cases:
- Dedicated GPU or AI workloads: You can apply taints to GPU-equipped nodes so that only machine learning, AI inference, or other accelerator-dependent workloads with matching tolerations can be scheduled there.
- Infrastructure and system services: Taints let you reserve specific nodes for critical Kubernetes components, monitoring agents, logging services, or ingress controllers by tainting those nodes and allowing only infrastructure workloads to tolerate them.
- Specialized hardware or high-performance nodes: Admins can use taints to dedicate nodes with high memory, fast NVMe storage, or other specialized hardware to applications that require those resources, preventing general-purpose workloads from consuming them.
- Maintenance planning and unhealthy nodes: It’s a common practice to taint nodes that are undergoing maintenance or have detected issues so the scheduler avoids placing new Pods there. NoExecute taints can also evict existing Pods, allowing workloads to be rescheduled onto healthy nodes.
How to add, view and remove Kubernetes taints
Applying and managing taints is a straightforward process that involves the kubectl taint nodes command.
To add a taint, specify the target node along with a key, optional value, and effect. For example, kubectl taint nodes worker-1 dedicated=gpu:NoSchedule adds a taint that prevents Pods without a matching toleration from being scheduled onto worker-1.
You can verify that a taint has been applied by running kubectl describe node worker-1, which lists all taints under the node details, or by using kubectl get nodes -o json or kubectl get node worker-1 -o yaml to inspect the node's configuration directly.
To remove a taint, run the same command but append a hyphen to the taint key, such as kubectl taint nodes worker-1 dedicated-, which removes all taints with the dedicated key from the node. If multiple taints share the same key but have different effects, you can specify the full taint to remove only the intended one.
After removing a taint, confirm the change by describing the node again and checking that the taint no longer appears. Once the taint is gone, the scheduler can once again consider the node for any Pod that meets its resource requirements and other scheduling constraints.
Kubernetes taints and node lifecycle management
Kubernetes taints play an important role in node lifecycle management by controlling workload placement as nodes change state throughout their operational life. During normal operation, administrators can use taints to dedicate nodes to specific workloads or keep infrastructure services isolated from application Pods. As nodes are provisioned, upgraded or repurposed, taints allow operators to gradually control which workloads are eligible to run on them without modifying application deployments. This provides a flexible way to manage node availability while maintaining predictable scheduling behavior across the cluster.
Taints are also used automatically by Kubernetes to respond to node health and availability events. For example, when a node becomes unreachable or reports conditions such as memory pressure, disk pressure or network issues, Kubernetes can apply built-in taints that influence scheduling decisions. New Pods are prevented from landing on unhealthy nodes while existing Pods may remain, be rescheduled or be evicted depending on the taint effect and the Pod's tolerations. During maintenance or node decommissioning, administrators often combine taints with cordoning and draining to safely migrate workloads to healthy nodes, helping maintain application availability while minimizing disruption.
Common risks and misconfigurations with Kubernetes taints
While taints are a powerful feature, they can cause issues if you misconfigure them. Common mistakes include:
- Missing Pod tolerations: Applying a taint without adding the corresponding toleration to the intended workloads can leave Pods stuck in the Pending state because the scheduler cannot find an eligible node.
- Overusing broad tolerations: Granting workloads overly permissive tolerations, such as tolerating all taints, defeats the purpose of taints and allows Pods to run on nodes that should be reserved or isolated.
- Using the wrong taint effect: Choosing NoExecute instead of NoSchedule can unintentionally evict running Pods, while using PreferNoSchedule when strict isolation is required may still allow workloads to be scheduled onto the node.
- Leaving temporary taints in place: Forgetting to remove maintenance or troubleshooting taints after the work is complete can reduce cluster capacity and prevent workloads from being scheduled onto otherwise healthy nodes.
- Not accounting for built-in node condition taints: Failing to understand or monitor automatically applied taints for conditions such as memory pressure, disk pressure, or node unavailability can result in unexpected scheduling behavior, Pod evictions, or reduced application availability.
Troubleshooting Kubernetes taints
If taints are not working as expected, you can begin the troubleshooting process by confirming whether a taint is preventing a Pod from being scheduled or causing it to be evicted. If a Pod remains in the Pending state, inspect it with kubectl describe Pod <Pod-name> and review the Events section for messages indicating that no nodes matched because of untolerated taints.
Next, examine the target nodes with kubectl describe node <node-name> to identify any configured taints and verify whether the Pod specification includes the required tolerations. Comparing the node's taints with the Pod's tolerations is often the quickest way to determine whether a scheduling failure is caused by a taint mismatch.
If the Pod was previously running but has been evicted or rescheduled unexpectedly, investigate whether Kubernetes automatically applied node condition taints due to issues such as memory pressure, disk pressure, or node unavailability. Review node conditions, cluster events, and scheduler logs to determine why the taint was added and whether the underlying problem has been resolved. If a taint was applied manually for maintenance or workload isolation, verify that it is still needed and remove it when appropriate. After making changes, monitor Pod scheduling and node status to confirm that workloads are being placed on the intended nodes without introducing new scheduling conflicts.
Best practices for managing Kubernetes taints at scale
The following best practices can help avoid mistakes and oversights when working with taints:
- Use consistent taint naming conventions: Standardize taint keys, values, and effects across clusters so administrators and application teams can easily understand their purpose and apply matching tolerations consistently.
- Apply the principle of least privilege: Add tolerations only to workloads that genuinely require access to tainted nodes rather than granting broad tolerations that weaken workload isolation.
- Automate taint management: Manage taints through Infrastructure as Code, GitOps workflows or cluster automation tools to ensure changes are version-controlled, repeatable and consistently applied across environments.
- Monitor taints and scheduling events: Track node taints, Pod scheduling failures and eviction events with your monitoring and logging platform to quickly identify misconfigurations, capacity issues or unexpected node conditions.
- Regularly review and remove unnecessary taints: Periodically audit node taints to eliminate obsolete maintenance or temporary taints, validate that workload placement policies still reflect operational requirements, and prevent unused taints from reducing cluster capacity.
Observing scheduling, evictions, and workload impact from Kubernetes taints with groundcover
One of the tricky things about taints is that Kubernetes won’t automatically alert you to taint issues or help you identify their root causes.
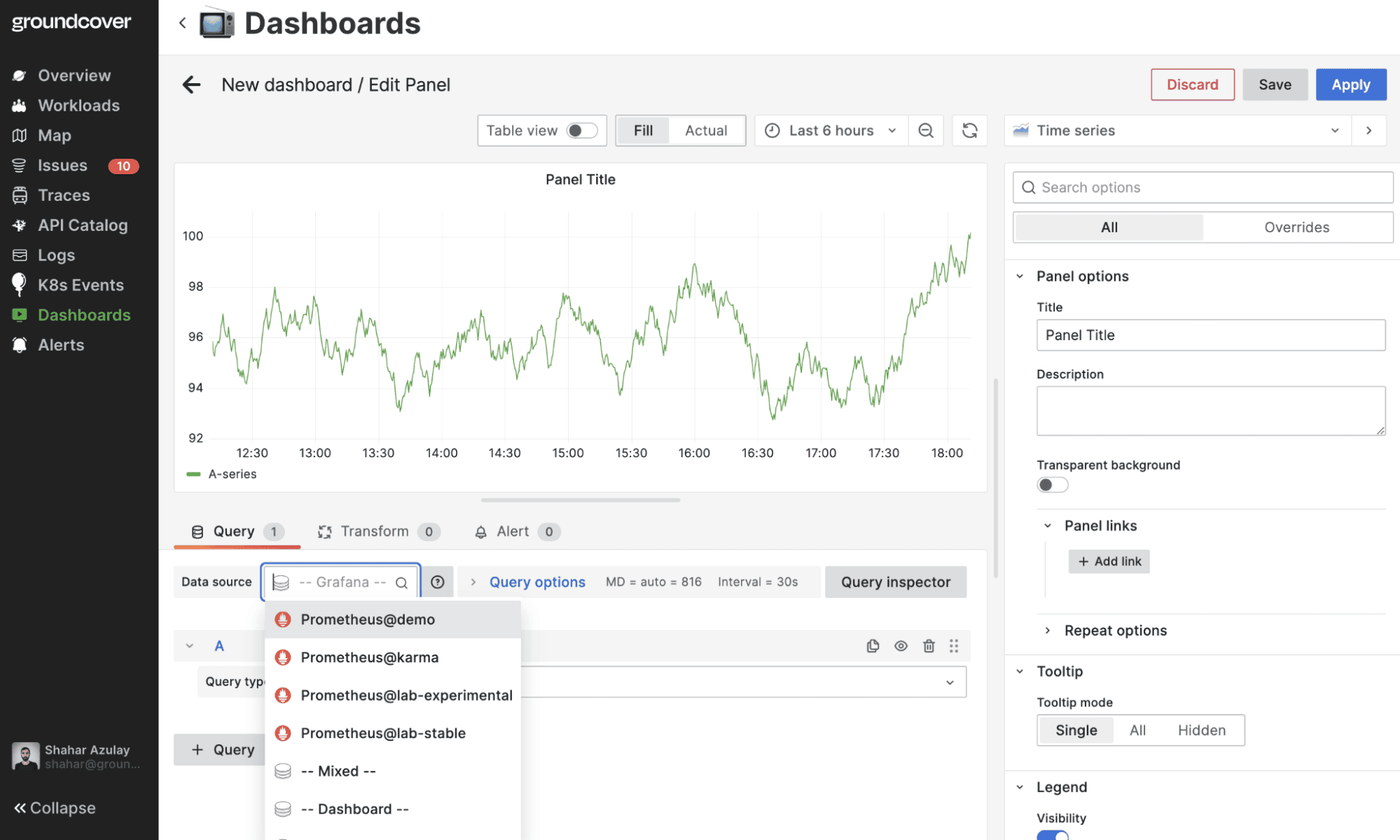
groundcover, however, delivers this level of visibility. By continuously monitoring scheduler behavior, node health, and events like Pod eviction, groundcover clues admins in quickly to taint misconfigurations and similar issues. In turn, it helps them get ahead of problems that could lead to workload disruption and inefficient use of node resources.
A Kubernetes taint strategy you can tolerate
Taints are a valuable feature anytime you need to control which Pods run on a node. But they can also be a complicated feature to work with, and small mistakes – like choosing the wrong type of effect or accidentally leaving a taint in place after it’s no longer necessary – can cause major workload issues. Hence the importance of continuously monitoring the status of Kubernetes taints to get ahead of potential mistakes and failures.
FAQs
Use Kubernetes taints when you want nodes to repel workloads by default and allow only explicitly authorized Pods to run on them. In contrast, node selectors and affinity rules are best when you want to “attract” workloads to nodes that are the best fit for them.
Yes. If you incorrectly configure NoExecute taints or forget to add Pod tolerations, Kubernetes can evict running Pods or prevent workloads from being rescheduled. This may lead to application disruptions or downtime.
groundcover correlates Kubernetes events, Pod status, logs, and metrics to help identify scheduling failures, Pod evictions, and node conditions related to taints, making it easier to pinpoint the root cause of workload placement issues.